Attention: this post provides a very quick and simplistic (but functional) vision of the promised title.
In the beginning
Linux is a fantastic OS, it has more than we imagine and it still manages to get better. There is a feature called cgroups:
which provides a mechanism for easily managing and monitoring system resources, by partitioning things like cpu time, system memory, disk and network bandwidth, into groups, then assigning tasks to those groups
Let’s say we created a cgroup with: 50% of cpu, 20% memory, 2% of disk and a virtual network with 100% of bandwidth, now we can run our application under that cgroups restrictions.
Another cool feature of Linux is LXC (linux-containers):
which combines kernel’s cgroups and support for isolated namespaces to provide an isolated environment for applications
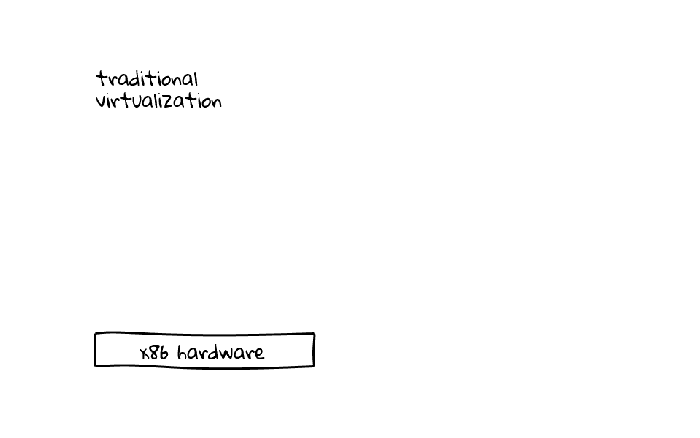
Now we’re able to provide a Linux machine capable of running multiple applications that run in isolation (like if there was an isolated OS for each application). This sounds like something we achieved with virtualization (app-level, os-level, cpu-level and so on) but faster and cheaper and without the overhead of running multiple kernels.
Docker
Docker is:
an open-source project that automates the deployment of applications inside software containers, by providing an additional layer of abstraction and automation of operating-system-level virtualization on Linux. This is what Docker is but remember, it is not perfect.
The highlighted part is very interesting, docker will provide you a layer of abstraction that allows you to create and deploy your application within a container (an isolated, resource managed place to run processes) in a standardized way.
Docker machine, compose and so on
Life almost always get easier with abstractions, we (developers) don’t worry about how disks works (drivers) or even how a package left your pc and hit another one (we should know how this works :P). Our productivity had increased a lot since we relied on these abstractions.
And this is the same for the docker ecosystem, as we start to use it more often. We create best practices, solve issues with workarounds and etc, some of these will become part of the docker solution.
- docker-machine: An application needs a machine to run regardless if it’s local, physical, virtual or in the cloud.
- docker-compose: An application needs a way to declare its dependencies, either packages or distinct services like datastore.
Step 0: get ready
- If you’re on MacOS/Windows you’ll need to install VirtualBox or VMWare
- If you’re on MacOS/Windows install docker toolbox otherwise apt-get them all
Step 1: create the app
Let’s say we’ll create a rails 4 application with mongo.
This file contains hidden or bidirectional Unicode text that may be interpreted or compiled differently than what appears below. To review, open the file in an editor that reveals hidden Unicode characters.
Learn more about bidirectional Unicode characters
| rails new myapp –skip-active-record |
Step 2: declare the app and its dependencies
We declare our dependencies by using two files: docker-compose.yaml and Dockerfile. In the Dockerfile we’ll describe how our machine should be (aka: all need packages and stuffs).
This file contains hidden or bidirectional Unicode text that may be interpreted or compiled differently than what appears below. To review, open the file in an editor that reveals hidden Unicode characters.
Learn more about bidirectional Unicode characters
| # we'll use an existent image which already have ruby installed | |
| FROM ruby:2.3.0 | |
| # creating our app folder | |
| RUN mkdir /myapp | |
| # move to this folder | |
| WORKDIR /myapp | |
| # move the Gemfile to our app's root folder | |
| ADD Gemfile /myapp/Gemfile | |
| # move the Gemfile.lock too | |
| ADD Gemfile.lock /myapp/Gemfile.lock | |
| # updates the system gem | |
| RUN gem update –system | |
| # run bundle install for production | |
| RUN bundle install –without development test | |
| # copy my code's folder to myapp | |
| ADD . /myapp |
Then we can move to its broad services dependencies, like database or even web server. We’ll use mongo as datastore and nginx as the web server.
This file contains hidden or bidirectional Unicode text that may be interpreted or compiled differently than what appears below. To review, open the file in an editor that reveals hidden Unicode characters.
Learn more about bidirectional Unicode characters
| # we'll call our web app of web | |
| web: | |
| # it'll build this container based the docker file ./Dockerfile | |
| build: . | |
| # it'll run this command to star the server | |
| command: bash -c "rm -f tmp/pids/server.pid || true && bundle exec rails s -p 3000 -b '0.0.0.0'" | |
| # it'll export the port 3000 | |
| ports: | |
| – "3000:3000" | |
| # it links to db container (on mongoid.yaml at rail's config we say host: db:27017 it's linked) | |
| links: | |
| – db | |
| # we called our db container of db 🙂 | |
| db: | |
| # instead of building it from zero we'll use an existent image (see docker hub) | |
| image: mongo | |
| # it needs to persist data so we keep it (even if we "kill" the container) | |
| volumes: | |
| – /data/db | |
| # we export the port 27017 :B | |
| ports: | |
| – "27017:27017" | |
| # we'll use nginx as web server | |
| nginx: | |
| # it'll restart when the container does too | |
| restart: always | |
| # we're going to build this container from docker file ./docker/nginx/Dockerfile | |
| build: ./docker/nginx/ | |
| # we're gonna expose 80 | |
| ports: | |
| – "80:80" | |
| # since we'll be a proxy we need to be linked to our web app (upstream= web:3000) | |
| links: | |
| – web:web |
This file contains hidden or bidirectional Unicode text that may be interpreted or compiled differently than what appears below. To review, open the file in an editor that reveals hidden Unicode characters.
Learn more about bidirectional Unicode characters
| # we'll build our container from an existent image 🙂 | |
| FROM nginx | |
| # for some reason we need to create this folder | |
| RUN mkdir -p /var/lib/nginx/proxy | |
| # copy our app config to nginx | |
| COPY sites-enabled/myapp.conf /etc/nginx/nginx.conf |
This file contains hidden or bidirectional Unicode text that may be interpreted or compiled differently than what appears below. To review, open the file in an editor that reveals hidden Unicode characters.
Learn more about bidirectional Unicode characters
| # we'll use 2 processors/core | |
| worker_processes 2; | |
| # we set a new limit for open files for our workers | |
| worker_rlimit_nofile 100000; | |
| # we define how we're going to work | |
| events { | |
| # for each worker we'll handle 4000 requests (enquee them) | |
| worker_connections 4000; | |
| # we'll accept multiple | |
| multi_accept on; | |
| # we'll use epoll as a IO event notification | |
| use epoll; | |
| } | |
| # our server | |
| http { | |
| server_tokens off; | |
| include /etc/nginx/mime.types; | |
| default_type application/octet-stream; | |
| access_log off; | |
| open_file_cache max=200000 inactive=20s; | |
| open_file_cache_valid 30s; | |
| open_file_cache_min_uses 2; | |
| open_file_cache_errors on; | |
| sendfile on; | |
| keepalive_timeout 30; | |
| reset_timedout_connection on; | |
| gzip on; | |
| gzip_http_version 1.0; | |
| gzip_proxied any; | |
| gzip_min_length 500; | |
| gzip_disable "MSIE [1-6]\."; | |
| # we created that folder because we save our cache in there | |
| proxy_cache_path /var/lib/nginx/proxy levels=1:2 keys_zone=backcache:8m max_size=50m; | |
| proxy_cache_key "$scheme$request_method$host$request_uri$is_args$args"; | |
| proxy_cache_valid 404 1m; | |
| # we'll forward request to our web app at 3000 | |
| upstream app_server { | |
| server web:3000 fail_timeout=0; | |
| } | |
| server { | |
| # listening at 80 | |
| listen 80; | |
| # compreess it | |
| gzip_static on; | |
| gzip_http_version 1.1; | |
| gzip_proxied expired no-cache no-store private auth; | |
| gzip_disable "MSIE [1-6]\."; | |
| gzip_vary on; | |
| # some security precautions | |
| client_body_buffer_size 8K; | |
| client_max_body_size 20m; | |
| client_body_timeout 10s; | |
| client_header_buffer_size 1k; | |
| large_client_header_buffers 2 16k; | |
| client_header_timeout 5s; | |
| keepalive_timeout 40; | |
| # let's get rid of simple attackers GET /admin/setup.php …. | |
| location ~ \.(aspx|php|jsp|cgi)$ { | |
| return 404; | |
| } | |
| # let's try to serve static files otherwise forward to app | |
| try_files $uri $uri/index.html $uri.html @app; | |
| # app is a proxy to our web app | |
| location @app { | |
| proxy_set_header X-Url-Scheme $scheme; | |
| proxy_set_header X-Forwarded-For $proxy_add_x_forwarded_for; | |
| proxy_set_header Host $host; | |
| proxy_redirect off; | |
| proxy_pass http://app_server; | |
| } | |
| # let's serve error pages | |
| error_page 500 502 503 504 /500.html; | |
| location = /500.html { | |
| root /myapp/public; | |
| } | |
| } | |
| } | |
Step 3: deploy it locally
We need to create a machine for it and then we need to run it.
This file contains hidden or bidirectional Unicode text that may be interpreted or compiled differently than what appears below. To review, open the file in an editor that reveals hidden Unicode characters.
Learn more about bidirectional Unicode characters
| # we'll create a "machine" called dev on virtualbox | |
| docker-machine create –driver virtualbox dev | |
| # let's use this machine | |
| eval "$(docker-machine env dev)" | |
| # let's take note of our docker-ip | |
| docker-machine ip dev | |
| # let's run this app | |
| docker-compose up | |
| # now go to your browser and type ip 🙂 it should show something | |
Step 4: deploy in the cloud
The same way we created a machine to run our app locally ,we can create any number of machines to run this application, even in cloud environment such as digitalocean, aws, azure, google and etc.
That’s it 🙂 for a more explained rails app docker workflow read this great post or yet a fresh new example of docker-compose.yaml.
This file contains hidden or bidirectional Unicode text that may be interpreted or compiled differently than what appears below. To review, open the file in an editor that reveals hidden Unicode characters.
Learn more about bidirectional Unicode characters
| # creating an amazon machine | |
| docker-machine create –driver amazonec2 –amazonec2-access-key XXX –amazonec2-secret-key "xxxxx" –amazonec2-vpc-id vpc-xxx –amazonec2-zone Y amazon | |
| # creating a digital ocean machine | |
| docker-machine create –driver digitalocean –digitalocean-access-token=XXX do | |
| # let's take note of our ip | |
| docker-machine ip amazon | |
| # let's deploy our application | |
| docker-machine up |
// TODO: some things
Let’s suppose we just created a staging environment and another developer come to help us, it seems that there is no an official way to share our created machine (amazon, google app engine, azure, digital ocean…) with team members. There are some workarounds but it’ll be nice to see this becoming a feature.
Troubleshooting
- Useful commands to troubleshooting, exploration and debug:
- To enter on a machine: $ docker-machine ssh staging (either local or cloud)
- To enter on a container: $ docker-compose run db bash (either local or cloud)
- To list files within a container: $ docker-compose run db ls -lah data/db
- To edit/add/remove data on mongo: $ mongo –host DOCKER_IP
- If you face any error like E: Failed to fetch … during the docker-compose build try it again
- If you face any error like “Error creating machine: Error running provisioning: Unable to verify the Docker daemon is listening: Maximum number of retries (10) exceeded” during any deployment, try to download docker-toolbox again and install it.
Google is your friend.
